取消互動式登入,可以解決這樣的問題,但請不要忘了自己的使用者名稱,雖然有辦法救,可是工程是非常浩大的。
請注意!家用版,沒有本機安全性選項,因此無法使用此功能。
互動式登入啟用中

取消互動式登入


# mkdir -p /secon/semanagerdir

# mkdir /secon/chcondir

# ll -dZ /secon/semanagerdir

 drwxr-xr-x. root root unconfined_u:object_r:default_t:s0 /secon/semanagedir/

# ll -dZ /secon/chcondir

 drwxr-xr-x. root root unconfined_u:object_r:default_t:s0 /secon/chcondir/
# ll -Zd /secon/semanagedir/

 drwxr-xr-x. root root system_u:object_r:default_t:s0   /secon/semanagedir/

# semanage fcontext -a -t httpd_sys_content_t '/secon/semanagedir(/.*)?'

# restorecon -FRvv /secon/semanagedir/

 restorecon reset /secon/semanagedir context system_u:object_r:default_t:s0->system_u:object_r:httpd_sys_content_t:s0

# ll -Zd /secon/semanagedir/

 drwxr-xr-x. root root system_u:object_r:httpd_sys_content_t:s0 /secon/semanagedir/
# ll -Zd /secon/chcondir/

 drwxr-xr-x. root root system_u:object_r:default_t:s0   /secon/chcondir/

# chcon -t httpd_sys_content_t -R /secon/chcondir/

# ll -Zd /secon/chcondir/

 drwxr-xr-x. root root unconfined_u:object_r:httpd_sys_content_t:s0 /secon/chcondir/

# restorecon -FRvv /secon/chcon/

 restorecon reset /secon/chcondir context unconfined_u:object_r:httpd_sys_content_t:s0->system_u:object_r:default_t:s0

# ll -Zd /secon/chcondir/

 drwxr-xr-x. root root system_u:object_r:default_t:s0   /secon/chcondir/
# yum install -y yum-plugin-priorities
failovermethod=priority

priority=N  //N=1~99,1 優先權最高


# vim /etc/postfix/main.cf

 message_size_limit = 26214400  // 限制 25MB(25*1024*1024=26,214,400)
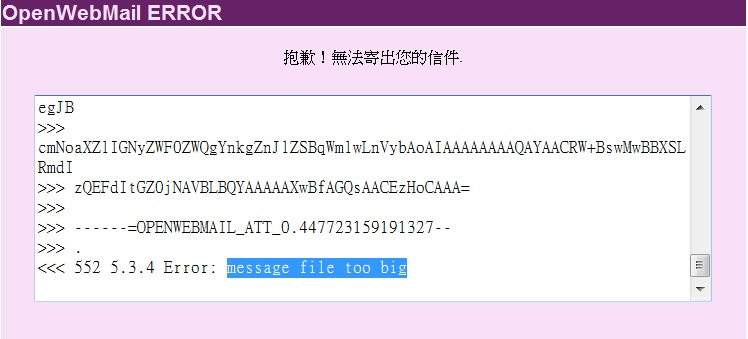
如果還是寄不出去,就是你所在區網的 MTA 有限制附件大小,像台灣大學是限制 25MB。
# vim /var/www/cgi-bin/openwebmail/etc/openwebmail.conf

 attlimit 25000  // 單位是 KB
# vim /var/www/cgi-bin/openwebmail/etc/openwebmail.conf

 abook_maxsizeallbooks 1000000  // 通訊錄大小限制

 abook_importlimit 100000  // 匯入檔案大小限制
# wget http://openwebmail.org/openwebmail/download/redhat/rpm/release/openwebmail.repo -P /etc/yum.repos.d/  //-P 是指定路徑

# yum install -y openwebmail perl-CGI

# /var/www/cgi-bin/openwebmail/openwebmail-tool.pl --init

 Please change '/var/www/cgi-bin/openwebmail/etc/dbm.conf' from  // 出現警告訊息,請修改 dbm.conf 的內容


 dbm_ext          .db

 dbmopen_ext        .db

 dbmopen_haslock      no


 to


 dbm_ext          .pag

 dbmopen_ext        none

 dbmopen_haslock      no


 And execute '/var/www/cgi-bin/openwebmail/openwebmail-tool.pl --init' again!  // 修改完成後再執行一次


 ps: If you are running openwebmail in persistent mode,

   don't forget to 'touch openwebmail*.pl', so speedycgi

   will reload all scripts, modules and conf files in --init.


# /var/www/cgi-bin/openwebmail/openwebmail-tool.pl --init

 creating db /var/www/cgi-bin/openwebmail/etc/maps/b2g ...done.

 creating db /var/www/cgi-bin/openwebmail/etc/maps/g2b ...done.

 creating db /var/www/cgi-bin/openwebmail/etc/maps/lunar ...done.


 Creating UTF-8 locales...

 langconv ar_AE.CP1256 -> ar_AE.UTF-8

 langconv ar_AE.ISO8859-6 -> ar_AE.UTF-8

 langconv bg_BG.CP1251 -> bg_BG.UTF-8

 langconv ca_ES.ISO8859-1 -> ca_ES.UTF-8

 langconv cs_CZ.ISO8859-2 -> cs_CZ.UTF-8

 ...done.


 Welcome to the OpenWebMail!


 This program is going to send a short message back to the developer,

 so we could have the idea that who is installing and how many sites are

 using this software, the content to be sent is:


 OS: Linux 2.6.32-279.11.1.el6.x86_64 x86_64

 Perl: 5.010001

 WebMail: OpenWebMail 2.53 20080123


 Send the site report?(Y/n) y

 sending report...

 Thank you.
# vim /var/www/cgi-bin/openwebmail/etc/openwebmail.conf

 enable_spamcheck     yes

 enable_learnspam     yes

 webdisk_rootpath     /

 webdisk_lshidden     yes


# service httpd restart


# chcon -u system_u /var/log/openwebmail.log

# chcon -t httpd_sys_script_rw_t /var/log/openwebmail.log

# chcon -t httpd_unconfined_script_exec_t /var/www/cgi-bin/openwebmail/openwebmail*

# yum install -y postfix
# chkconfig postfix on
# service postfix start
# iptables -I INPUT -p tcp --dport 25 -j ACCEPT
# vim /etc/postfix/main.cf

 myhostname = postfix149.example.com  //完整的FQDN

 mydomain = example.com

 myorigin = $myhostname

 inet_interfaces = all       //記得註解inet_interfaces = localhost

 mynetworks = 140.112.xxx.xxx/25, 127.0.0.0/8


# service postfix restart
# telnet 140.112.xxx.xxx 25

 Trying 140.112.xxx.xxx...

 Connected to 140.112.xxx.xxx.

 Escape character is '^]'.

 220 postfix149.example.com ESMTP Postfix


# telnet postfix149.example.com 25

 Trying 140.112.xxx.xxx...

 Connected to postfix149.example.com.

 Escape character is '^]'.

 220 postfix149.example.com ESMTP Postfix
# mail -s "postfix_test" aaa@bbb.ccc

這是測試信

.    //『.』是結束符號

EOT
# vi /etc/sysconfig/network-script/ifcfg-eth0  // 最小安裝沒有 vim 可以用,但操作差不多

 DEVICE="eth0"

 BOOTPROTO="dhcp"

 HWADDR="00:0C:29:16:03:D1"

 IPV6INIT="yes"

 NM_CONTROLLED="no"   // 預設為 yes

 ONBOOT="yes"  // 預設為 no

 TYPE="Ethernet"

 UUID="ad0722c8-66bb-4d03-8dd0-8be3c6cd0d8b"


# service network restart

# ip a
# yum grouplist | grep --color X

 Legacy UNIX compatibility

 Legacy X Window System compatibility

 X Window System

 TeX support

 Xfce

 Xhosa Support [xh]
# yum groupinstall [-y] "X Window System" [&> /dev/null]  // 中括號 [] 內容加上後(不含 [])會自動安裝並隱藏安裝訊息

# yum groupinstall [-y] "Desktop" [&> /dev/null]

# yum groupinstall [-y] "Chinese Support [zh]" [&> /dev/null]  // 若想要支援中文環境再安裝就好
# vim /etc/inittab
 id:5:initdefault:
# reboot
# yum install -y samba-swat
# chkconfig swat on

# vim /etc/xinetd.d/swat

 service swat

 {

  disable = no

  port  = 901

  socket_type = stream

  wait   = no

  # only_from  = 127.0.0.1

  user  = root

  server  = /usr/sbin/swat

  log_on_failure += USERID

 }


# srvice xinetd restart

# vim linuxtext.txt

 linux

 哈

 哈


# od -c linuxtext.txt

 0000000   l   i   n   u   x  \n 345 223 210  \n 345 223 210  \n

 0000016
# vim /etc/vsftpd/vsftpd.conf

 ascii_download_enable=NO  // 表示 FTP 伺服器只支援 Binary 型態下載

# yum install -y unix2dos &> /dev/null  // 安裝時不顯示安裝流程


# od -c linuxtext.txt

 0000000   l   i   n   u   x  \n 345 223 210  \n 345 223 210  \n

 0000016


# unix2dos linuxtext.txt

 unix2dos: converting file linuxtext.txt to DOS format ...


# od -c linuxtext.txt

 0000000   l   i   n   u   x  \r  \n 345 223 210  \r  \n 345 223 210  \r

 0000020  \n

 0000021

# yum install -y kernel

# ll /boot | grep --color -E 'vmlinuz|initramfs'

 -rwxr-xr-x. 1 root root  3986608 2012-06-22 20:44 vmlinuz-2.6.32-279.el6.x86_64

 -rw-r--r--. 1 root root 16363554 2012-08-26 14:33 initramfs-2.6.32-279.el6.x86_64.img
# rpm -Uvh kernel-firmware-2.6.32-279.el6.noarch.rpm  // -U 不保留舊版本

# rpm -ivh kernel-2.6.32-279.el6.x86_64.rpm
# vim /etc/yum.repos.d/vmwaretools.repo

 [vmware]

 name=vmware

 baseurl=http://packages.vmware.com/tools/esx/5.1/rhel6/x86_64/

 enable=1
# yum install -y vmware-tools* // 因為不知道要安裝那些,索性全部安裝
# vim /etc/httpd/conf.d/vhost.conf

 NameVirtualHost *:80


 <VirtualHost *:80>  // 此區塊設定可以省略

   DocumentRoot /var/www/html

   ServerName apacheserver139.example.com

 </VirtualHost>


 <VirtualHost *:80>

   DocumentRoot /var/www/vhost

   ServerName vhostapacheserver139.example.com

 </VirtualHost>


 <VirtualHost *:80>

   DocumentRoot /var/www/svhost

   ServerName secretapacheserver139.example.com

   <Directory /var/www/svhost>

      AuthName "Secret Hideout"

      AuthType basic  // 傳輸過程不加密,因此最好搭配 ssl 才安全。

      AuthUserFile /var/www/svhost/users

      require valid-user

   </Directory>

 </VirtualHost>
# service httpd restart

# echo "apacheserver139.example.com" > /var/www/html/index.html
# mkdir /var/www/vhost

# ll -dZ /var/www/vhost/

 drwxr-xr-x. root root unconfined_u:object_r:httpd_sys_content_t:s0 /var/www/vhost/


# echo "vhostapacheserver139.example.com" > /var/www/vhost/index.html
注意:因為資料夾 vhost 是以管理者身份在路徑 /var/www 底下產生的,所以 SELinux context types 是 httpd_sys_content_t,如果是在別的路徑,就要改變 SELinux context 否則無法存取首頁。指令請看 Troubleshootingbr />
# mkdir /var/www/svhost

# echo "secretapacheserver139.example.com" > /var/www/vhost/private/index.html
# vim /etc/httpd/conf/httpd.conf

 NameVirtualHost *:80


 <VirtualHost *:80>  // 此區塊設定可以省略

   DocumentRoot /var/www/html

   ServerName apacheserver139.example.com

 </VirtualHost>


 <VirtualHost *:80>

   DocumentRoot /var/www/vhost

   ServerName vhostapacheserver139.example.com

 </VirtualHost>


 <VirtualHost *:80>

   DocumentRoot /var/www/svhost

   ServerName secretapacheserver139.example.com

   <Directory /var/www/svhost>

      AuthName "Secret Hideout"

      AuthType basic  // 傳輸過程不加密,因此最好搭配 ssl 才安全。

      AuthUserFile /var/www/svhost/users

      require valid-user

   </Directory>

 </VirtualHost>
# service httpd configtest  // 使用httpd -t亦可

 Syntax OK
# htpasswd -cm /var/www/svhost/users privateuser

 New password: 1

 Re-type new password: 1

 Adding password for user privateuser
# service httpd restart
# vim /etc/hosts

 127.0.0.1  localhost localhost.localdomain localhost4 localhost4.localdomain4

 ::1     localhost localhost.localdomain localhost6 localhost6.localdomain6


 10.10.10.139 apacheserver139.example.com

 10.10.10.139 vhostapacheserver139.example.com

 10.10.10.139 secrteapacheserver139.example.com


# chcon -Rt httpd_sys_content_t /another_path // 參數『R』是將路徑下的所有資料也一併變更
# chcon -R --reference /var/www/html /another_path // 參考 /var/www/html 的 SELinux context type
# yum install -y ganglia ganglia-gmetad.x86_64 ganglia-gmond.x86_64 ganglia-web.x86_64
# chkconfig gmetad on

# chkconfig gmond on
# vim /etc/ganglia/gmond.conf

 cluster {

 name = "santana"

 owner = "unspecified"

 latlong = "unspecified"

 url = "unspecified"

 }
# service gmond start

# service gmetad start
# service httpd restart

# setsebool -P httpd_can_network_connect 1
所有安裝及設定步驟與Master相同


# yum install -y tigerVNC
# vncview&


# yum install -y samba(samba-client cifs-utils)
註:
# chkconfig nmb on ; chkconfig smb on
# iptables -I INPUT -p udp --dport 137:138 -j ACCEPT

# iptables -I INPUT -p tcp --dport 139 -j ACCEPT

# iptables -I INPUT -p tcp --dport 445 -j ACCEPT

# service iptables save

# iptables -L -n | grep --color -Ew '13[789]|445'

# groupadd -r sambauser

# mkdir -p /sharedir/santana      // 建立共享資料夾

# chgrp sambauser /sharedir/santana  // 變更共享資料夾群組

# chmod 2775 /sharedir/santana    // 變更共享資料夾權限

# chcon -t samba_share_t /sharedir/santana  // SELinux 設定

# vim /etc/samba/smb.confg

 [global]

 workgroup = career
 security = usr        // share 不需要認證,user 需要認證

 passdb backend = tdbsam  // 檔案是 passdb.tdb

 ; hosts allow = 127. 192.168.0  // 先用分號註解。


 [santana]  // 共享目錄名稱,使用 smbclient 查詢時所顯示的共享資料夾名稱

 path = /sharedir/santana

 write list = @sambauser

 writeable = yes

 public = no

 browseable = yes

 ; hosts allow = 127. 192.168.0  // 先用分號註解。
注意:
# testparm // 自動載入 /etc/samba/smb.conf
# useradd -s /sbin/nologin sambauser

# smbpasswd -a sambauser

 New SMB password: 『1』

 Retype new SMB password: 『1』

 Added user sambauser.

# useradd -s /sbin/nologin sambauser2

# smbpasswd -a sambauser2

 New SMB password: 『1』

 Retype new SMB password: 『1』

 Added user sambauser2.

# useradd -s /sbin/nologin -G sambauser sambauser3

# smbpasswd -a sambauser3

 New SMB password: 『1』

 Retype new SMB password: 『1』

 Added user sambauser3.
# pdbedit -L

 sambauser:502:  // 查看 samba 使用者是否已建立。

 sambauser2:503:

 sambauser3:504:
# service nmb start ; service smb start
# yum install -y samba-client cifs-utils
# smbclient -L 10.10.10.137

# smbclient //10.10.10.137/santana -U sambauser%1 // santana 是共享資料夾的設定名稱 [santana]
# mkdir /mnt/smb

# mount //10.10.10.137/santana /mnt/smb -o username=sambauser%1

# df

# touch i.am.sambauser.txt

# mount //10.10.10.137/santana /mnt/smb -o username=sambauser2%1

# mount //10.10.10.137/santana /mnt/smb -o username=sambauser3%1

# df

# touch i.am.sambauser3.txt

# ll /mnt/smb

# chkconfig netfs on

# service netfs start

# echo '//10.10.10.137/santana /mnt/smb cifs username=sambauser%1 0 0' >> /etc/fstab

# mount -a
# mount //10.10.10.137/share_samba /mnt/samba/ -o username=sambauser%1

 mount: block device //10.10.10.137/share_samba is write-protected, mounting read-only

 mount: cannot mount block device //10.10.10.137/share_samba read-only
# tail messages

 Oct 17 22:24:08 sambaserver137 kernel: CIFS VFS: cifs_mount failed w/return code = -13

 Oct 17 22:24:16 sambaserver137 tpvmlpd2[2886]: device type not supported

 Oct 17 22:24:16 sambaserver137 tpvmlpd2[1895]: aborting

 Oct 17 22:24:24 sambaserver137 kernel: CIFS VFS: cifs_mount failed w/return code = -22

 Oct 17 22:24:28 sambaserver137 kernel: Status code returned 0xc000006d NT_STATUS_LOGON_FAILURE

 Oct 17 22:24:28 sambaserver137 kernel: CIFS VFS: Send error in SessSetup = -13

 Oct 17 22:24:28 sambaserver137 kernel: CIFS VFS: cifs_mount failed w/return code = -13

 Oct 17 22:24:28 sambaserver137 kernel: Status code returned 0xc000006d NT_STATUS_LOGON_FAILURE

 Oct 17 22:24:28 sambaserver137 kernel: CIFS VFS: Send error in SessSetup = -13

 Oct 17 22:24:28 sambaserver137 kernel: CIFS VFS: cifs_mount failed w/return code = -13
# yum install -y cifs-utils.x86_64
# smbclient -L 10.10.10.137

 Enter root's password:

 protocol negotiation failed: NT_STATUS_INVALID_NETWORK_RESPONSE

# yum install -y samba
# chkconfig nmb on  // 提供 NetBIOS 名稱解析

# chkconfig smb on  // 提供檔案共享及列印服務
# iptables -I INPUT -p udp --dport 137:138 -j ACCEPT

# iptables -I INPUT -p tcp --dport 139 -j ACCEPT

# iptables -I INPUT -p tcp --dport 445 -j ACCEPT

# service iptables save
# mkdir /sharedir  // 建立共享資料夾

# chcon -t samba_share_t /sharedir  // SELinux設定

# vim /etc/samba/smb.confg

 [global]

 workgroup = career

 netbios name = santanalee

 security = usr  //share 不需要認證,user 需要認證

 passdb backend = tdbsam  // 檔案是 passdb.tdb


 [share_samba]  // 共享目錄名稱

 path = /sharedir

 valid users = sambauser

 writeable = yes

 public = no

 browseable = yes  // 若設定為no,但如果登入者知道完整路徑仍可存取。

 available = yes  // 此區段設定是否動作,預設是yes,可以不用輸入
# testparm  // 自動載入 /etc/samba/smb.conf

 Load smb config files from /etc/samba/smb.conf

 rlimit_max: increasing rlimit_max (1024) to minimum Windows limit (16384)

 Processing section "[homes]"

 Processing section "[printers]"

 Unknown parameter encountered: "aprintable"

 Ignoring unknown parameter "aprintable"

 WARNING: [printers] service MUST be printable!

 Loaded services file OK.

 Server role: ROLE_STANDALONE

 Press enter to see a dump of your service definitions
# useradd -s /sbin/nologin sambauser

# smbpasswd -a sambauser

 New SMB password: 『1』

 Retype new SMB password: 『1』

 Added user sambauser.
# pdbedit -L

 sambauser:502:
# service nmb start ; service smb start


# setsebool -P samba_enable_home_dirs 1
# yum install -y samba-client
# smbclient -L 10.10.10.137

# smbclient //10.10.10.137/share_samba -U sambauser%1

 // 可使用 NetBIOS Name 或 IP 位址,另外 sambauser%1 的寫法,密碼會留在歷史資料內,不加 %1 系統會出現提示輸入訊息。
# mkdir /mnt/smb

# mount(-t cifs)//10.10.10.137/share_samba /mnt/smb -o username=sambauser%1  // 檔案系統參數可以不用下

# df

# chkconfig netfs on

# service netfs start

# echo '//10.10.10.137/share_samba /mnt/smb cifs username=sambauser%1 0 0' >> /etc/fstab

# mount -a
# yum install -y nmap
# nmap -sT 140.112.xxx.xx  // sT = scan TCP


 Starting Nmap 5.51 ( http://nmap.org ) at 2012-10-12 15:04 CST

 Nmap scan report for pcxx.career.studa.ntu.edu.tw (140.112.xxx.xx)

 Host is up (0.0014s latency).

 Not shown: 996 filtered ports

 PORT    STATE SERVICE

 21/tcp  open  ftp

 22/tcp  open  ssh

 80/tcp  open  http

 443/tcp open  https


 Nmap done: 1 IP address (1 host up) scanned in 25.23 seconds
# nmap -sU 140.112.xxx.xx  // sU = scan UDP

 Starting Nmap 5.51 ( http://nmap.org ) at 2012-10-12 15:05 CST

 Nmap scan report for dns.career (140.112.xxx.xx)

 Host is up (0.00036s latency).

 Not shown: 999 open|filtered ports

 PORT    STATE SERVICE

 123/udp open  ntp


 Nmap done: 1 IP address (1 host up) scanned in 4.03 seconds
# nmap -A 140.112.xxx.xx

# vim /etc/script

 case $1 in a)

         echo Apple;;

         b)

         echo Ball;;

         *)


         echo "請輸入A或B";;


 esac
# chmod 744 /etc/script

# /etc/script a

 Apple
# echo 'acl example' > /home/aclexample.txt

# groupadd manager

# chgrp manager /home/aclexample.txt
# usermod -G manager normal

# id normal

 uid=500(normal) gid=500(normal) groups=500(normal),502(manager)


# usermod -G manager normal2

# id normal2

 uid=501(normal2) gid=501(normal2) groups=501(normal2),502(manager)
# setfacl -m u:normal:rw- /home/aclexample.txt

# setfacl -m u:normal1:--- /home/aclexample.txt

# getfacl /root/aclexample.txt

 getfacl: Removing leading '/' from absolute path names

 # file: home/aclexample.txt

 # owner: root

 # group: manager

 user::rw-

 user:normal:rw-

 user:normal2:---

 group::r--

 mask::rw-

 other::r--
$ echo 'i am normal' >> /home/aclexample.txt

$ cat /home/aclexample.txt

 acl example

 i am normal
$ echo 'i am normal2' >> /home/aclexample.txt

 -bash: /home/aclexample.txt: Permission denied


# mkdir /home/test

# chmod 2775 /home/test

# chgrp manager /home/test

# setfacl -m d:u:user3:--- /home/test

# ll -d /home/test

 drwxrwsr-x+ 2 root manager 4096 Dec 11 10:56 /home/test  // 有 Default ACLs 的目錄或檔案都會有個加號。


############user1、user2 及 user3 皆可以在 /home/test 產生目錄及檔案############

# su - user1

user1 $ mkdir /home/test/user1

user1 $ echo "i am user1" > /home/test/user1.txt

user1 $ exit


# su - user2

user2 $ mkdir /home/test/user2

user2 $ echo "i am user2" > /home/test/user2.txt

user2 $ exit


# su - user1

user3 $ mkdir /home/test/user3

user3 $ echo "i am user3" > /home/test/user3.txt

user3 $ exit


############ user3 無法讀寫存取其他使用者在 /home/test 底下的目錄及檔案############


user3 $ echo "i am user3" >> /home/test/user1.txt

    -bash: user1.txt: Permission denied

user3 $ echo "i am user3" >> /home/test/user2.txt

    -bash: user2.txt: Permission denied

user3 $ ll /home/test/user1

    ls: cannot open directory /home/test/user1: Permission denied

user3 $ ll /home/test/user2

    ls: cannot open directory /home/test/user2: Permission denied


############其他使用者可相互讀寫存取在 /home/test 的目錄及檔案############

user1 $ ll /home/test/user2

    total 0

user1 $ echo "i am user1" >> /home/test/user2.txt

user1 $ exit

    logout


# su - user2

user2 $ ll /home/test/user1

    total 0

user2 $ echo "i am user2" >> /home/test/user1.txt

user2 $ ll /home/test/user3

    total 0

user2 $ echo "i am user2" >> /home/test/user3.txt


